
How to Install a Rear Spoiler for Enhanced Performance
Key Takeaways
- Installing a rear spoiler can significantly improve your VW's aerodynamics.
- Step-by-step guidance simplifies the installation process.
- Ensure you have all necessary tools before starting your project.
- Choose quality products, such as the Carbon Fiber Rear Trunk Roof Spoiler, for optimal performance.
Installing a rear spoiler can be an excellent upgrade for your VW, enhancing both its aesthetics and performance. A spoiler improves airflow, increasing downforce and stability at higher speeds. In this guide, we’ll walk you through the steps to successfully install a rear spoiler on your VW.
Why Install a Rear Spoiler?
Rear spoilers are not just for show—they serve multiple practical functions. Here are some of the main benefits:
- Aerodynamics: Spoilers help manage airflow, stabilizing the vehicle at high speeds.
- Aesthetics: They enhance the visual appeal of your car, making it look sportier.
- Cooling: Improved airflow can assist in cooling components like the radiator.
Tools You'll Need
Proper preparation is key. Ensure you have the following tools ready before beginning the installation:
- Drill with drill bits
- Screwdriver set
- Measuring tape
- Masking tape
- Wrenches
- Clean cloth
- Adhesive (if applicable)
Installation Steps
Step 1: Prepare the Vehicle
Start by cleaning the area where the spoiler will be installed. Remove any dirt or grime to ensure proper adhesion.
Step 2: Align the Spoiler
Using your measuring tape, find the center of the trunk. Place the spoiler on the trunk, ensuring it is centered. Use masking tape to temporarily hold it in place.
Step 3: Mark Drill Points
Once you are satisfied with the placement, mark the drill points through the holes in the spoiler onto the trunk using a pencil. This will guide your drilling.
Step 4: Drill Holes
Carefully drill the marked holes. Remember to start with a smaller drill bit and widen the holes as necessary.
Step 5: Secure the Spoiler
Align the spoiler with the drilled holes and use the provided screws to secure it. Make sure everything is tight and secure. If the product requires adhesive, apply it as well.
Step 6: Clean Up
Once installed, remove any excess adhesive and gather your tools. Take a moment to admire your work!
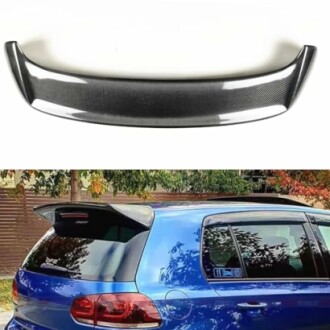
Featured Product: Carbon Fiber Rear Trunk Roof Spoiler
 Top Choice
Carbon Fiber Rear Trunk Roof Spoiler For VW Golf VI 6 MK6 GTI R20 2010-2015
Made from lightweight and durable carbon fiber, this spoiler enhances your vehicle's aerodynamics without compromising style.
Learn MoreCommon Mistakes to Avoid
Here are some pitfalls to keep in mind during installation:
- Rushing the cleaning process—proper adhesion requires a clean surface.
- Incorrect measurements—double-check your measurements to ensure a straight fit.
- Forgetting to secure all screws—make sure all fasteners are tight to avoid failure during high speeds.
Conclusion
Installing a rear spoiler on your VW is a rewarding project that can significantly enhance your car’s performance and appearance. By following these steps and using high-quality products like the Carbon Fiber Rear Trunk Roof Spoiler, you can confidently tackle this upgrade on your own.
Tips for a Successful Installation
- Take your time preparing the surface and marking measurements.
- Consider enlisting a friend to help hold the spoiler in place during installation.
- Review your vehicle's manual for any specific installation instructions.
- Test-drive your car after installation to feel the difference in performance.
Interested in More Upgrades?
Check out our other guides for enhancing your VW: