
DIY Guide to Installing Coilovers in Your VW
Key Takeaways
- Understand the benefits of upgrading to a coilover suspension system.
- Gather all necessary tools and parts before starting the installation.
- Follow the step-by-step instructions for a smooth installation process.
- Adjust the settings for optimal performance once installation is complete.
Upgrading to a coilover suspension system is one of the best ways to enhance the handling and performance of your Volkswagen. This DIY guide will walk you through the entire installation process, from gathering tools to fine-tuning your new coilovers. With the right steps, you'll be able to achieve improved ride quality and handling characteristics for your VW.
Why Install Coilovers?
Coilovers provide various benefits that include adjustable ride height, improved handling, and increased stability. Here are some reasons to consider installing coilovers in your VW:
- Customizable ride height for a personalized look and performance.
- Enhanced handling response during driving.
- Improved suspension performance compared to factory setups.
- Ability to fine-tune for different driving conditions.
Tools You Will Need
Before starting your coilover installation, make sure you have the following tools at hand:
- Socket set
- Torque wrench
- Spring compressor
- Adjustable wrench
- Mechanic's gloves
- Safety goggles
- Jack and jack stands
Step-by-Step Installation Process
Step 1: Prepare Your Vehicle
Begin by parking your VW on a flat surface and lifting it with a jack. Secure the vehicle with jack stands to ensure safety.
Step 2: Remove the Existing Suspension
You will need to remove the stock struts and springs. Follow these steps:
- Detach the wheels.
- Remove the brake calipers and secure them away from the work area.
- Unbolt the upper and lower strut mounts and take out the existing struts.
Step 3: Install the Coilovers
Now it’s time to install your new coilovers. Here’s how:
- Using a spring compressor, prepare the coilover springs.
- Insert the coilover assembly into the strut towers and secure it with the necessary bolts.
- Reattach the brake calipers.
- Repeat on the other side of the vehicle.
Step 4: Adjust the Coilover Settings
Once installed, you will need to adjust the ride height. It’s crucial to check the desired height and ensure both sides are even.
Step 5: Reinstall the Wheels and Test Drive
After adjustments, reinstall your wheels securely. Once finished, take your VW for a test drive to make sure everything is functioning properly.
Product Recommendations
To help you with your coilover installation, consider these highly recommended products:
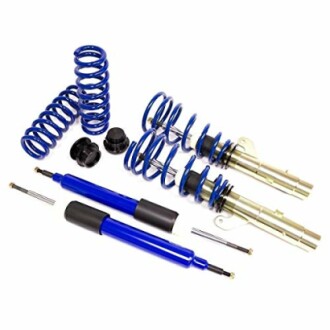 Performance Upgrade
S1VW012 S1 Coilover System
Designed for VW MKVII Golf & GTI and Audi models, offering high-performance tuning with gas charged dampening and elastomer bumpstops.
Explore NowThis coilover system is known for its quality and durability, ensuring you get the most out of your suspension upgrade.
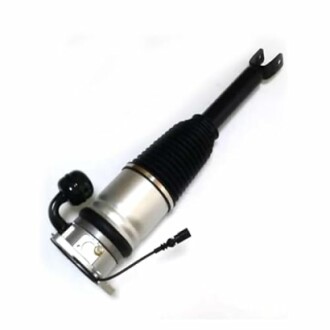 Comfort Enhancer
Rear Right Air Ride Suspension Shocks
Compatible with various VW and Bentley models, this air suspension system boosts comfort and adjusts according to driving conditions.
See ProductCommon Pitfalls to Avoid
As with any DIY project, there are challenges to be aware of:
- Not fully securing the coilovers can lead to safety issues.
- Neglecting to adjust ride height can cause uneven wear on tires.
- Forgetting to torque bolts to manufacturer specifications can result in performance problems.
Conclusion
Installing coilovers in your VW is a rewarding project that can significantly enhance your vehicle's performance and aesthetics. By following this guide, you’ll not only improve your car but also gain valuable knowledge in vehicle maintenance. Happy tuning!
Tips for Beginners
- Take your time to understand each step before proceeding.
- Have a friend assist you; an extra set of hands can be very useful.
- Consult your vehicle manual for specific torque specifications.
Explore More Resources
For additional information and guides, check out: